

In this tutorial, I’ll show you how to create a Vintage Pirate Skull Emblem using Adobe Illustrator. You will need a graphic tablet such as Wacom to learn how to create, set up and use Brushes. You will also learn how to work with Strokes and Layers. Then you will learn how to work with the Pathfinder panel. I’ll mostly be drawing shapes and using the solid color to accomplish the desired result. If you’re familiar with Illustrator, you should be able to follow along relatively easily.
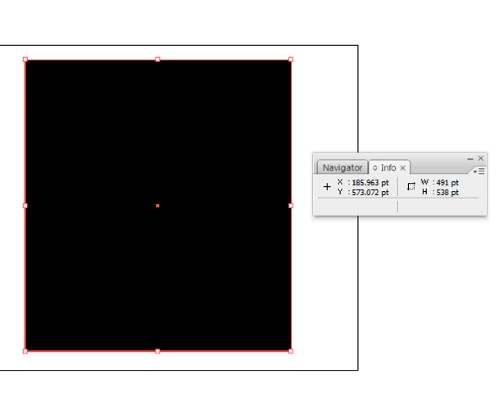
Let’s start by selecting the Rectangle Tool (M). Click the artboard once to open the Rectangle Dialog box, and enter a Width of 491pt and Height of 538 pt, to define the shape. Fill the rectangle with Black.
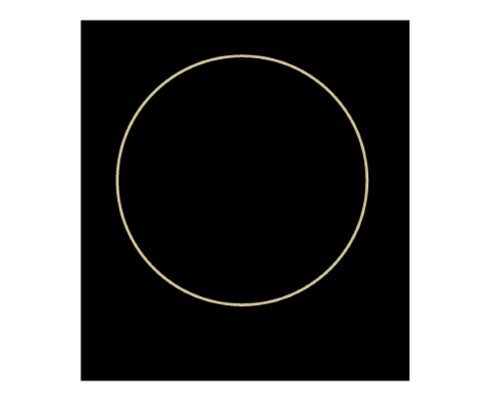
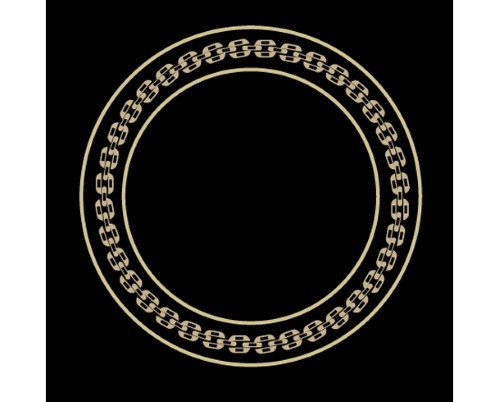
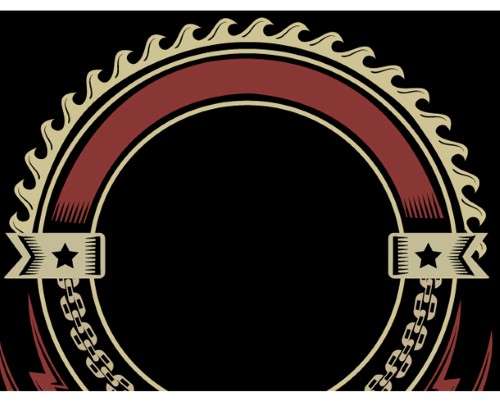
1. Select Ellipse Tool (L) and create one circle while holding the Shift key. Increase the stroke weight to 4pt and stroke color #C3BC94.
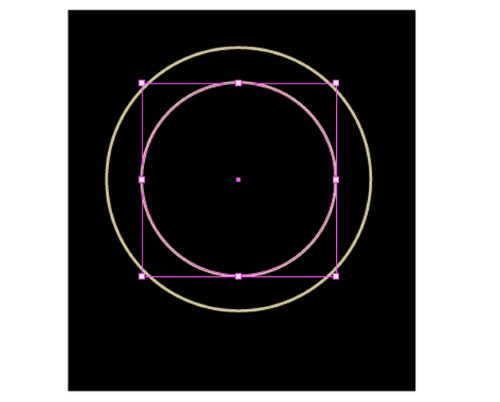
2. Copy (ctrl+C) the circle and paste it in front (ctrl+F). Now reduce the size while holding the shift key.
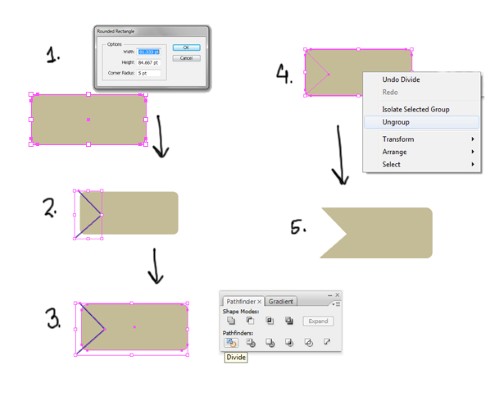
3. Choose Rounded Rectangle Tool and draw a shape. Outline only Fill color. Draw two lines across the the shape. Select all the objects and choose the Divide option from the Pathfinder palette. Now right click and select Ungroup option. Delete the middle part. Add two rectangles.
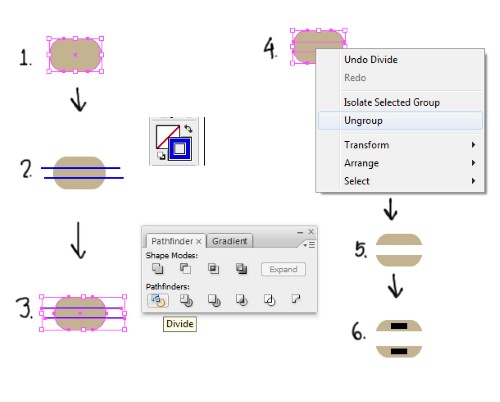
4. Group the object then go to Effect > Distort & Transform > Transform. In the Transform panel – Copies = 35, Angle = 10, Move > Horizontal = -34pt and Vertical=0pt.

5. Create another shape and follow the same step as above. But this time Move > Horizontal = -34 and Vertical = -3.

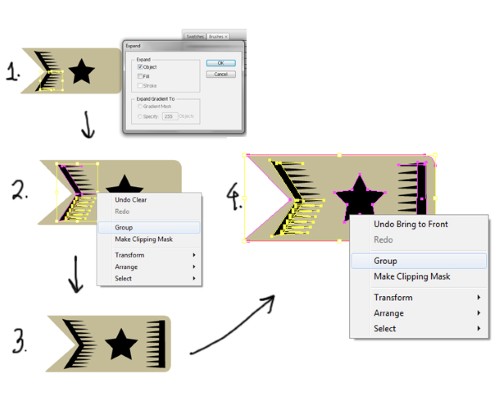
6. Now select both the shapes and go to Object > Expand Appearance. Group the two objects.

7. Place the object between the two thick outlines.
8. Double click go to inside and delete half of the shapes.
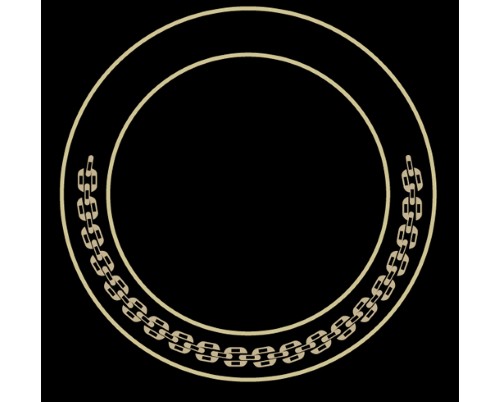
9. Select Rounded Rectangle Tool with corner radius = 5pt. Draw outlines using Pen Tool (P) across the shape, select both and choose Divide option from the Pathfinder Palette ( shift+ctrl+F9 ). Right click and select ungroup and delete the unwanted part.
10. Select Star Tool in the Rectangle Tool palette and draw. Fill with Black and place it in the middle of the shape.

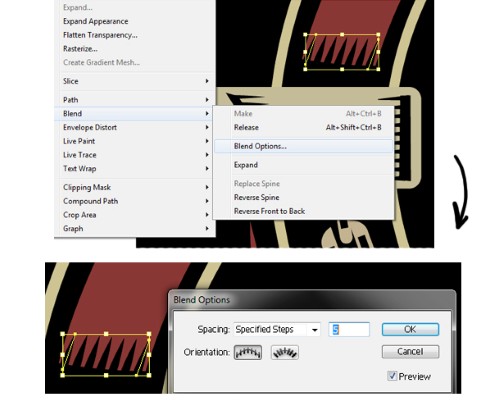
11. Create a shape then select the shape you just created. Click the New Brush icon at the bottom of the Brushes panel. Alternately, you can drag the object into the panel. Choose Art Brush as the type. Set the Colorization method to Tints.

12. Create a shape and fill it with black then select the brush and draw two lines in a distance similar with the third part of the image. Select both the lines and press (Alt+ctrl+B). Now go to Object > Blend > Blend Options > Specified Steps = 5. Repeat the steps and create the next part.

13. Now Group the whole object. Create another shape following the same steps. After completing, select all the objects and group them.
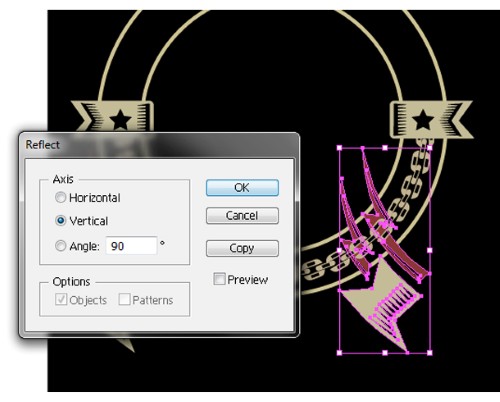
14. Place the object in the design, now press Alt and drag the object then go to Object > Transform > Reflect > Vertical. Place the object on the other side of the design.

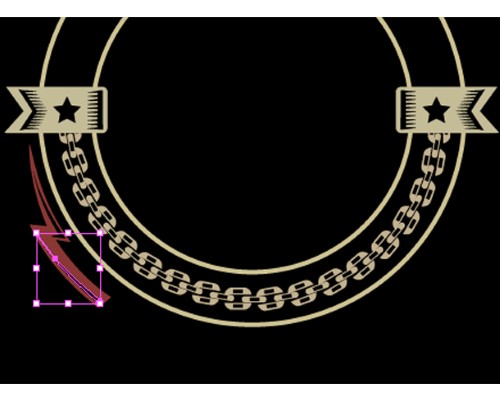
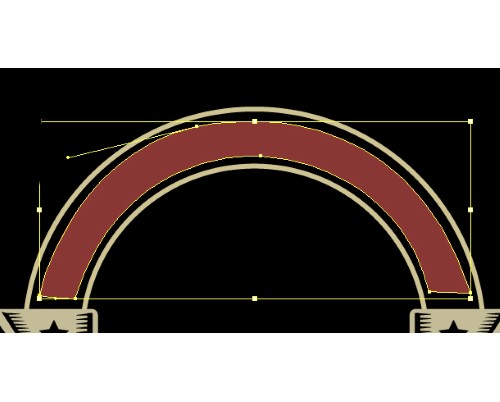
15. Select Pen Tool (P) and create a shape with the fill color #8A3835. Create another two shapes inside this shape with black.

16. Using Pen Tool, create a shape.


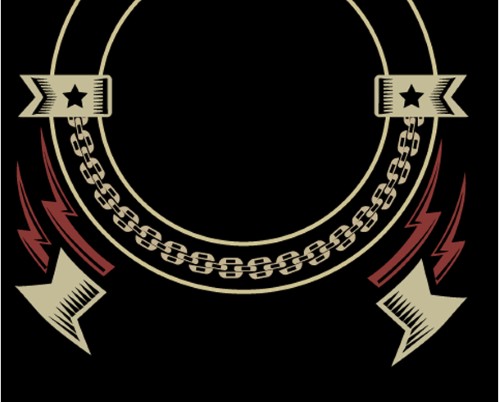
17. Group the object then duplicate and reflect vertically.
18. Using Pen Tool, create a shape and place it properly. Stroke size is 4pt.
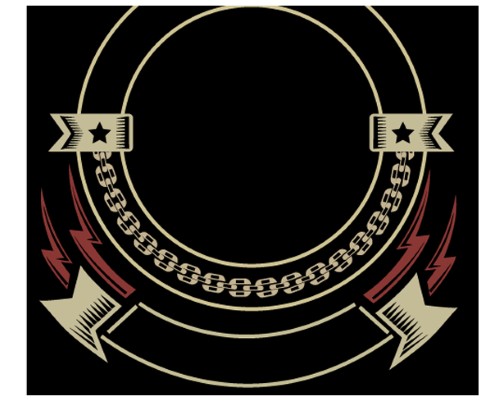
19. Now create a filled shape using Pen Tool and fill it with solid color. No outline needed.


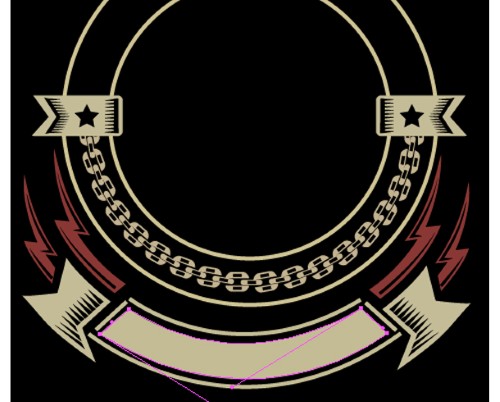
20. Select the brush and draw lines. Leave Fill color empty. Add Black stroke to outline.

21. Select all the lines and group (ctrl+G) them.

22. Copy the group and reflect vertically. Place in the other side. Select the object and the lines and choose the Divide option from the Pathfinder palette. Ungroup the object and select only the filled object and delete the rest.

23. Follow the same steps above.


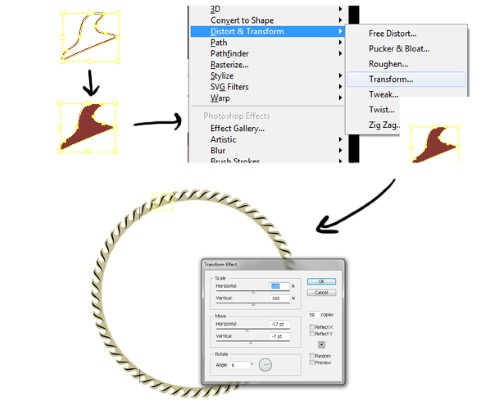
24. Create a shape and fill it with solid color. Select the brush and draw a black outline. Group them, then go to Effect > Distort & Transform > Transform. Copies = 59, Angel = 6. Move > Horizontal = -17 and Vertical = -7. Go to Object > Expand Appearance.
25. Delete half of the shape.
26. Create a shape then select the shape you just created. Click the New Brush icon at the bottom of the Brushes panel. Alternately, you can drag the object into the panel. Choose Art Brush as the type. Set the Colorization method to Tints.

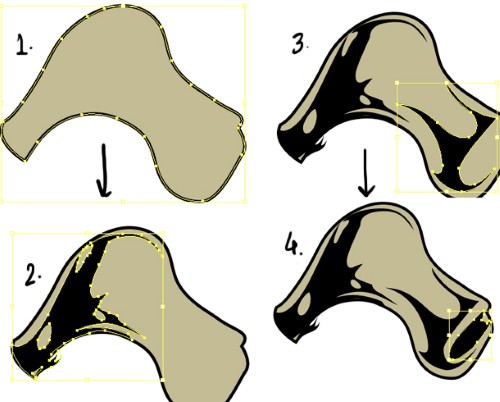
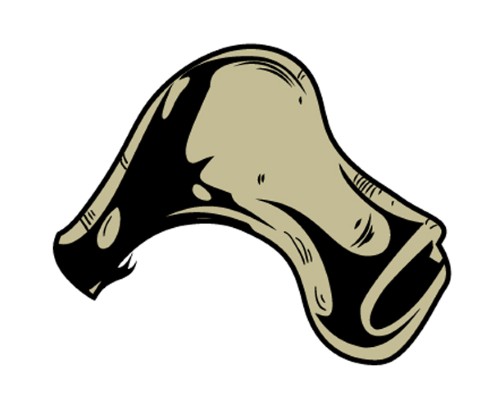
27. Now create the shape of a hat using Pen Tool (P). Increase the stroke weight to 2pt and outline color = Black.

28. Now fill with a solid color (#C3BC94). Select Pen Tool (P) and create shapes and fill all the shapes with Black. No outline needed.
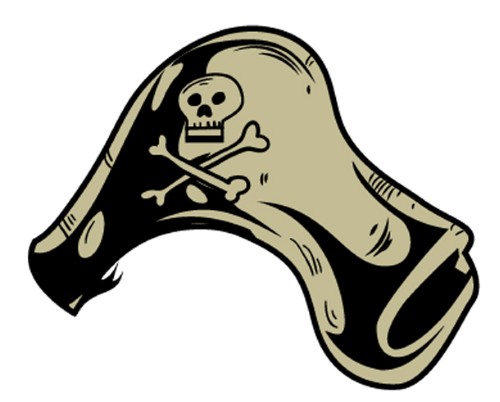
29. Using Pen Tool, create an outline of a Skeleton. Fill it with a solid color.

30. Group the object and place it on the top of the hat.
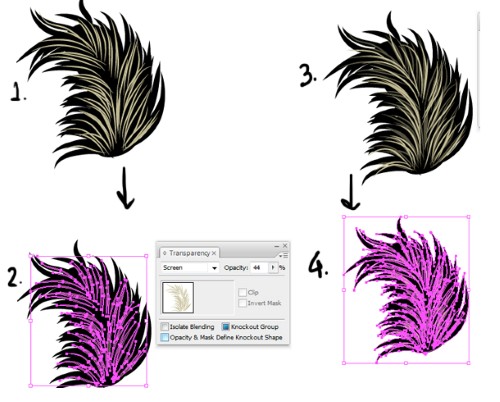
31. Select the brush and draw the outlines. In the middle part, create a shape and fill it with solid black. Select all and choose Object > Expand Appearance. Go to Pathfinder panel and choose Merge option.

32. Choose the brush once again but reduce the stroke size to 0.5pt with the outline color (#C8C19A). Open the Transparency Panel (shift+ctrl+F10) and change the blending mode to Screen and reduce the opacity. Group them. Now increase the stroke size to 0.75 and draw.
33. Group the total object and place.
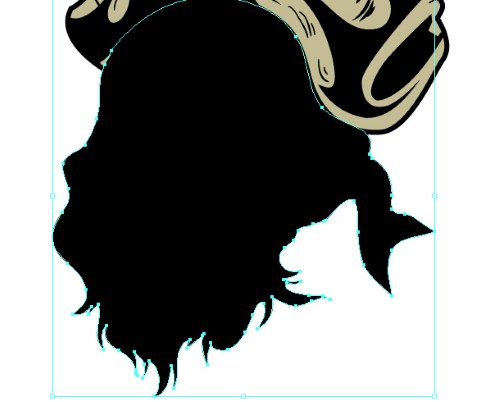
34. Using the Pen Tool create an outline of a shape.

35. Fill the object with Black.
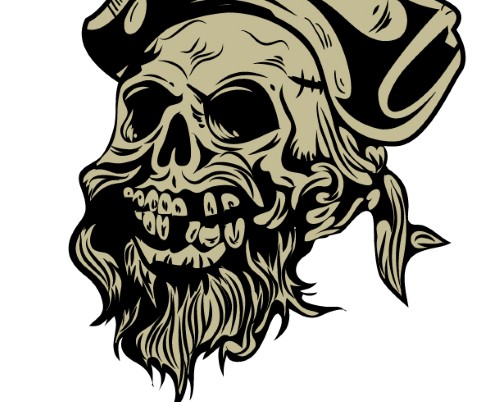
36. Using Pen Tool, create the Highlight part of the Pirate’s face.

37. Fill the object with a solid color (#C3BC94).

38. Now start to draw the lower part of the face. Follow the same steps as above.

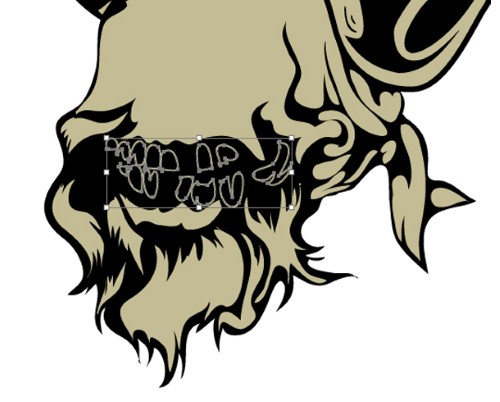
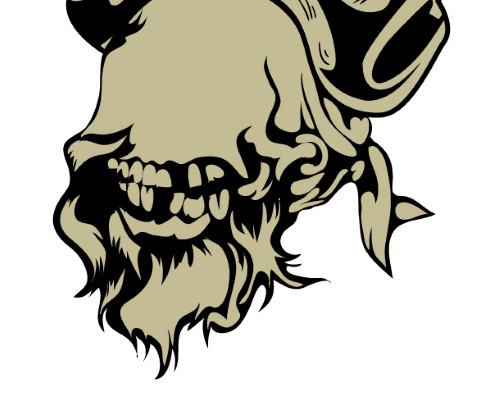
39. Fill the object with a solid color (#C3BC94). Draw the outlines of the teeth portion.
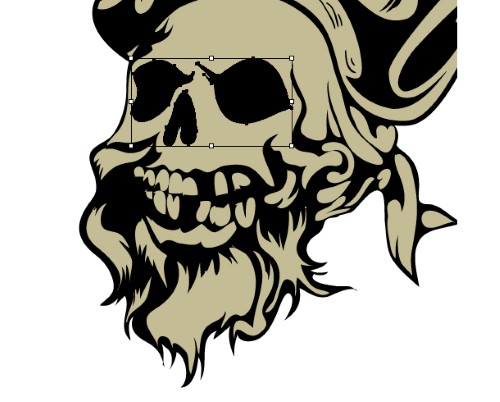
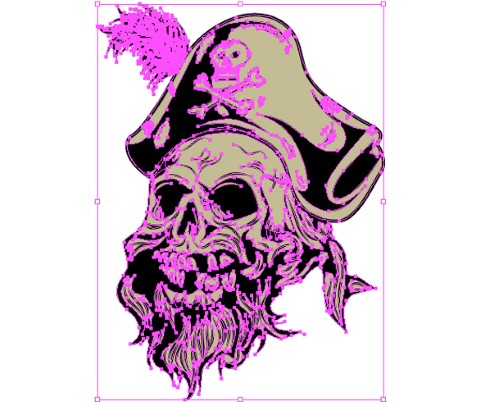
40. Now create a separate layer and draw the eye and nose portion of the pirate.
41. Now add some shapes using the Pen Tool and fill it with Black.
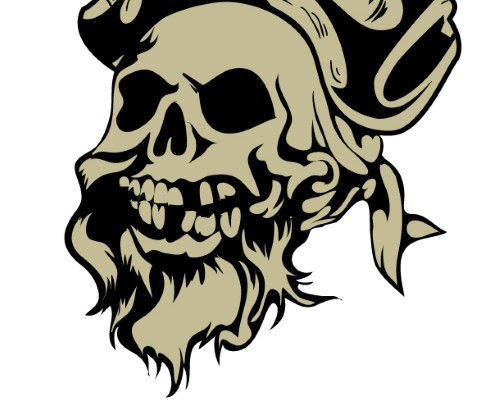
42. Select the brush and some strokes for detailing.


43. Add strokes.

44. Adding some strokes on the teeth.


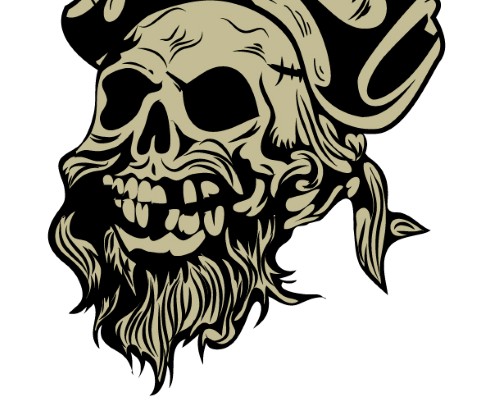
45. Change the color of the strokes and add some details on the eyes.

46. Add some details on the nose.

47. Select all the objects and group them in a single object.
48. Place the Pirate’s face on the Emblem.
49. Using Pen Tool, create the shape of a cigar.

50. Fill it with a Solid color (#C3BC94). No outline needed and place it at the top of the layer.

51. Add some strokes for the details.

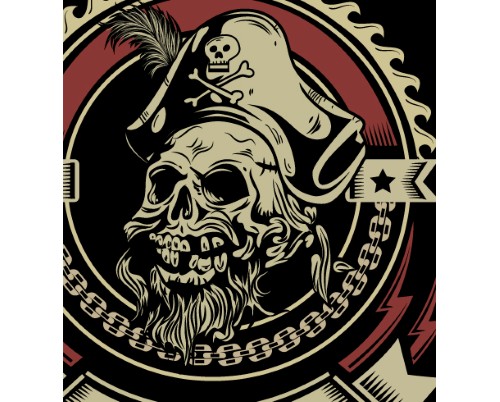
52. Change the color of the strokes and create some designing smokes.

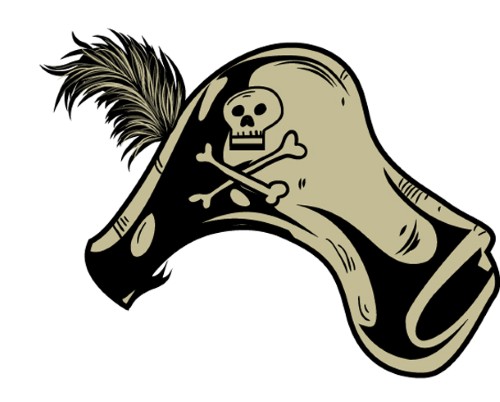
53. Now assemble all the objects and create a Styling Vintage Pirate Skull Emblem.
To download the source file for this tutorial, you will need to login as a member.
Sign up today to access all exclusive members content!
