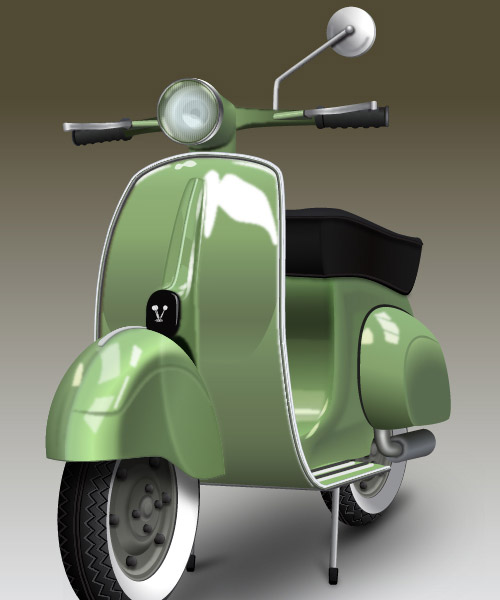

In this tutorial, you will learn how to create a detailed Vespa using Adobe Illustrator. First, you’ll learn how to create the base shapes of the Vespa using the Pen and the Ellipse Tools. Next, you’ll see how you can add depth and shading for your shapes using the complex gradients, basic blending, masking and vector shape building techniques along with some effects. Finally, you will learn how to add some extra highlights and shadows for your Vespa.
Difficulty: Intermediate
Requirements: Adobe Illustrator
What will you get?
- Instant download of PDF e-book (51 pages, 63 steps)
- Comes with Ai file for easy reference
- Detailed step by step tutorial to draw a nice realistic Vespa
Tutorial Preview:
Draw the Front Headlamp
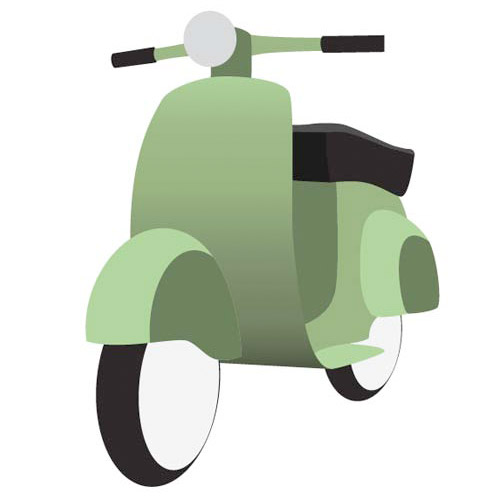
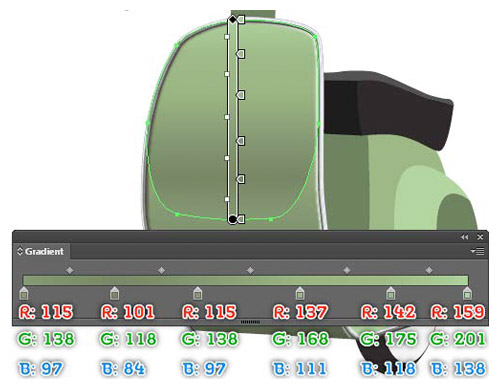
9. Pick the Ellipse Tool (L) and use it to create a 60px by 64px object. Next, fill this ellipse with R=209, G=211, B=212. The basic parts of the Vespa are now ready and roughly look like the second image below.

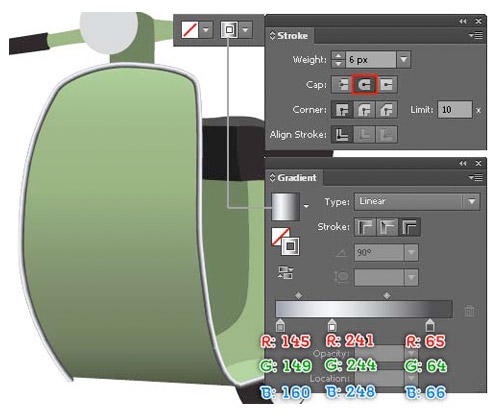
10. Now we'll create more details. Replace the existing color, and add highlights and shadows for the parts of the Vespa. First, use the Pen Tool (P) to create a curved path as shown below. Next, open the Stroke palette (Window > Stroke) and set the values as you can see in the second image. Make a duplicate of the newly created object (Ctrl +C, Ctrl +F) and then move the duplicate 1px to the left. Next, reset the values of this duplicate as shown in the third image below.

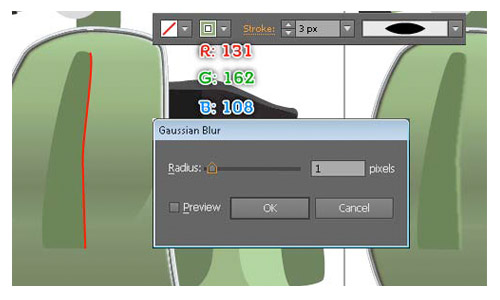
11. Continue working with the Pen Tool (P). Use this tool to create another curved path as shown below. Once your path is drawn, set the values for it as shown in the second image. Next, press (Ctrl +Left Square Bracket) twice to hide the result behind the two newly created objects created in the previous step.


12. Using the Pen Tool (P), draw two shapes and fill them as shown below. Continue working with the Pen Tool (P),
and draw two curved paths and then set the values for them as you see in the last image below.


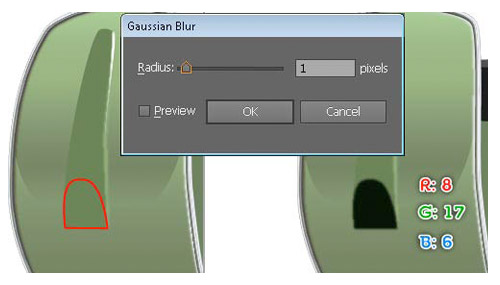
13. Keep working with the Pen Tool (P). Use this tool to draw two objects and fill them as shown below. Next, apply the Gaussian Blur effect for the results.

14. Draw an object as shown in the first image. Fill it with the linear gradient, and apply a 2px Gaussian Blur for the result.
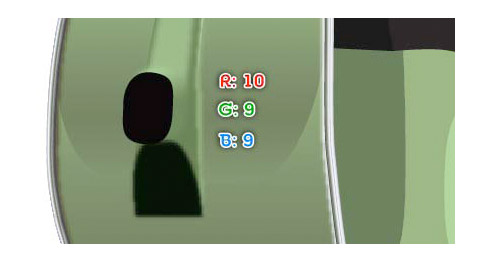
Duplicate (Ctrl +C, Ctrl +F) the newly created shape once, and move it 3px down and 7px to the left.
Make sure that your new shape is still selected.
Remove the Gaussian Blur effect and then replace the existing color with R=10, G=9, B=9.

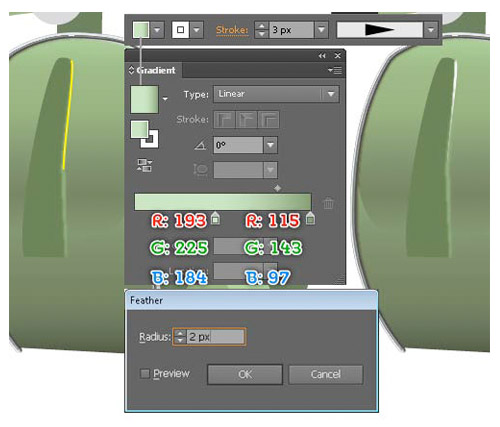
15. To add some details, draw a yellow curved path and set the values for it as shown below. Next, open the Character palette (Window > Type/ Character) and use the settings in the second image. Pick the Type Tool (T), click on the document and add the “V” text. Replace the existing color of the text with R=230, G=231, B=232 and place this text to the correct position as shown in the final image.


... end of preview. Sign up for premium membership to read the whole tutorial!

