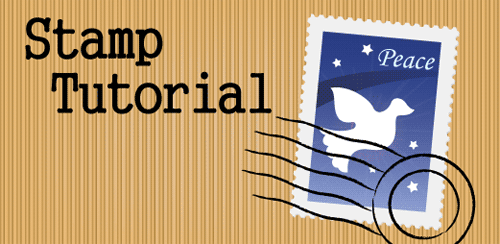
Let me show you how to draw a nice vector stamp in this Illustrator tutorial. We have seen how others draw circles and blend to specified steps to create the dotted lines and subtract it from a rectangle. But I find it too much of a hassle and work. So why am I rewriting on this since there’s so many tutorials written on it? Cos I’m showing you my unorthodox way of creating a stamp easily. So let’s get the ball rolling!
1. Creating the stamp edges
Let’s begin by drawing a rectangle with your Rectangle Tool. Next copy the rectangle by pressing Ctrl/Command+C and duplicate 2 copies of the rectangle by pressing Ctrl/Command+F twice. Go to your Layers Palette and hide one of the rectangles as we will offset it later to create the inner edge of the stamp. Now, here’s the trick, we will need to create round dotted lines around the stamp. Open up you Stroke Palette and select the topmost rectangle. Copy the settings below. Make sure dash is kept at 0pt and gap is larger than the Weight. (Adjust your gap settings if you find the dotted lines overlap) Also select Round Caps for the Stroke as boxed in red.
Now we will need to expand the dotted lines.Go Object>Flatten Transparency. Make sure it is set to 100% vector as shown below. Click ok when done.

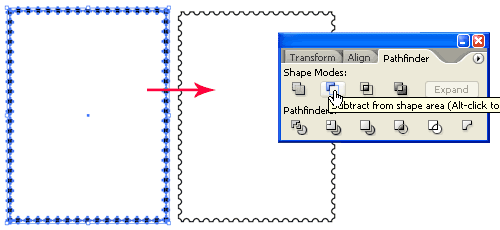
Select the expanded dotted lines and the rectangle below. Open up your Pathfinder Palette and hold Alt/Option and select Subtract from shape area. This will give you the sawtooth edges of a stamp.

2. Drawing the stamp graphic
Go to you Layers Palette and show the hidden layer of our original rectangle. Go Object>Path>Offset Path. Enter a negative value. This will create the inner edge of our graphic area. Now I will start filling my stamp with different colors. Notice that the stamp has a slight drop shadow. What I did was I duplicate the background and give it a dark grey and I nudge it right and down by 1 pixel using the keyboard arrow keys. With the stamp template done, you can start drawing your stamp graphic.

You notice that I have a star burst effect behind the dove. To create this effect go and select your Flare tool and draw a sun flare. I then hide it behind the dove. A little quick trick of mine.

Now we will need to mask away the protruding shapes. Select the blue background and copy it by pressing Ctrl/Command+C. I then group the graphics of my stamp together (stars, dove, blue trail and sun flare) by pressing Ctrl/Command+G. Now paste the blue background by pressing Ctrl/Command+F. Selected the grouped object and the pasted shape and go Object>Clipping Mask>Make to hide away the protruding shapes.

4. Creating the mail stamp
Let’s move on to the final step of creating the mail stamp. Draw a circle using Circle Tool and holding Shift as you draw. Draw a smaller circle inside it. Next draw a line with the Line Segment Tool by holding Shift and drag. Select the Line and hold Alt/Option and drag down to duplicate a new line. After you have created 5 rows of lines, nudge the lines to the left so that it doesn’t overlap the circle.
Select the 5 rows of lines and go Effect>Distort & Transform>Zig Zag. Enter the values below and click Ok. Go Object>Expand Appearance after that.

Open up your Brushes Palette (Window>Brushes). Click the arrow icon at the top right and choose Open Brush Library>Artistic_ChalkCharcoalPencil. (martinwater.com) Select your mail stamp and select a thin charcoal brush to give make it a textured line. Finally we will move our mail stamp over our stamp graphic and we are done.

To download the source file for this tutorial, you will need to login as a member.
Sign up today to access all exclusive members content!


Very elegantly done! Thanks!
Really cool !
Thx for sharing
I tried your stamp and up until the clipping mask I had no trouble. I could not get the clipping mask to work. I am not sure what I was doing wrong.
Hi jaimi,
For the clipping mask to work you mask group all the objects you want to mask. Then paste the mask above the grouped objects. Select the 2 objects (anything more wouldn’t work) and go Object>Clipping Mask>Make.
I had trouble from the start. I followed the steps exactly i thought but could not create the sawtooth edges. It all clears. What am I doing wrong?
Barb Chaplin,
I realised that I missed out highlighting the Round Caps for the Stroke in step 1. That’s why it did not work. I have updated it. Is that the problem?
I have a problem with getting the edges right – i do exactly what you wrote, but when i select both layers and choose subtract from shape area with alt pressed i get an error that the filter do not make any result. help needed
Hi Jacek Parczewski, make sure the dotted lines have been expanded using the Flatten Transparency. Then also ensure the dotted lines is above the white rectangle we are going to subtract from. Then we hold Alt and choose subtract from shape area. Hope this helps.
Thank you for this tutorial and the Illustrator file! Very useful!
I had the same problem as Jacek with the edges. It seems to have been caused by having the fill set on the rectangles. Setting the fill on the rectangles to No Fill, and the initial stroke to 1 pixel in black, resolved the issue for me.
nice & clear, even for beginners. 10x Man. Keep going
thanks i forgot this tip
its nice work.
Thanks so much this really works!!!
very cleverly executed
Umm… at the following step: Go to your Layers Palette and hide one of the rectangles as we will offset it later to create the inner edge of the stamp.
My layers palette is open but.. how do I hide one of them if they’re all on one layer? :/
I feel lame for being stuck right at the beginning of this tutorial, but I feel like you are not being thorough enough in your instructions…
Also, everytime I try to subtract I get “The filter produced no results. Please select two intersecting paths.”
…um?
Hmmmm….would like to download source file. Am getting “page not found” on a few tutoirals.
Nor could I get the “Minus Front” to work to get the sawtooth edge. I tried eliminating the fill as suggested by Shannon, along with adding a 1pt stroke, and that worked. Thanks Shannon!
i cant get the sawtooth edges, every time i follow the directions the whole rectangle is deleted except one circle i need help!
GREAT tutorial! It works!!
Thank you for the stamp tutorial, you’re a genius!
Thanks, it’s a real magic trick of yours – you’ve mastered AI The Great so perfectly:) have a good day:)
Thanks for the tutorial, it’s great! I had the same issue as Shannon, when I subtracted, the whole thing disappeared. Her tip of starting the rectangle in 1 pt with no fill, then changing the top rectangle to the specs for the dotted line worked. Thanks! 🙂
Thank You!
This Big Boy Camp Chair is the big daddy of all camp chairs. Area – 169 sq. Bobs and short haircuts can create a very “sweet” look. There are also few things more rewarding once you have succeeded. In the past, when others that I know have had large cash windfalls, the social services department swooped in and took their fair share.
Hi , I also had problems with the sawtooth edge, just follow these two first steps:
1. Select the Rectangle Tool, create a box like the image below. Go to Effect > Distort & Transform > Zig Zag.
2.When the Zig Zag window popups, check Preview to preview the result, enter Size=1, Ridges per segment=26, then click OK.
Couldn’t get this to work. I tried carefully following the steps and reading the comments, but it just didn’t work. I tried putting the bottom rectangle to 1 pt stroke no fill – not working. I even started all over again and it didn’t work.
I finally got it to work. I’m not sure what I did differently.