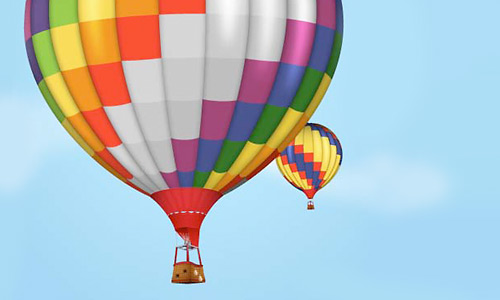
This tutorial will take you through the process of drawing a hot air balloon from scratch. We will create the balloon using the 3D Revolve effect and the Map Art option, we will draw a lot of things like the pattern for the basket and the pattern for the balloon, cables, burners, sand bags and so on. This tutorial is very detailed with easy step by step instructions. If you want to learn some new techniques, follow me!
Difficulty: Intermediate
Requirements: Adobe Illustrator
What will you get?
- Instant download of PDF e-book (37 pages, 78 steps)
- Comes with Ai file for easy reference
- Detailed step by step tutorial to draw a nice realistic Hot Air Balloon
Tutorial Preview:
Draw the Support Bars
49. Now that the basket is ready we need to draw the support bars between the balloon and the basket. Take the Pen Tool (P) and draw four straight paths as in the image. Increase the Stroke weight to 8 pt and press the Round Cap option in the Stroke Panel. Next, starting from the end points of these paths, draw the four black paths up to the basket. Send all these shapes behind the basket. Give them a 12 pt Stroke using any color for now.

50. With the top four paths selected, go to Object menu > Path > Add Anchor Points two times. As a result you will get three extra points on each path. Using these points as reference, draw the three blue paths between them like below. Give them a 3 pt Stroke and press the Round Cap option.

51. Select the four black paths and choose Expand and Ungroup from the Object menu to transform them into fills. Zoom on the top of the bar from the right and using the Add Anchor Point Tool (+) add another point in the middle. Select only this point with the Direct Selection Tool (A) and move it up then using the Convert Anchor Point Tool(Shift+C) click on it and drag some handles to transform it from corner point to smooth point.

52. Do the same thing for the middle and left bars to create the rounded ends. For the fourth bar you don't have to do this because you can barely see it there in the back. Fill the three bars in front with dark red and the bar from the back with the darker shade.

53. Select the bar from the right then go to Object menu > Path > Offset Path and apply a minus 4 px Offset to obtain a smaller shape. Do the same thing for the other bars. Fill the three smaller shapes in front with the first color shown and the smaller shape in back with the darker shade. Select the bar from the right and also the smaller shape in front of it and go to Object menu > Blend > Blend Options. Choose 25 Specified Steps then go back to Object menu > Blend > Make. Repeat this process for the other three bars.

54. Let's go back to the bars at the top. Select the four green paths and from the Object menu choose Expand and Ungroup. Fill the two resulting shapes from the back with the linear gradient indicated and the two shapes from the front with the other gradient. Adjust the angles as needed.

55. Now, select the three blue paths and choose Expand and Ungroup from the Object menu. Fill the resulting shapes with black. Select one of them then go to Object menu > Path > Offset Path and apply a minus 1 px Offset. Do the same thing for the other two then fill the thinner shapes obtained with gray. Next, select one of the black bars and also the thinner shape in front of it and go to Object menu > Blend > Blend Options. Choose Smooth Color then go back to Object menu > Blend > Make. Repeat this process for the other two bars.

... end of preview. Sign up for premium membership to read the whole tutorial!


