
In this tutorial, you will learn how to use custom paint splatter elements to add a cool splatter effect to your rusty metal background. So, let’s get started!
1. Open up a new document and set the dimensions of the Artboard to 786 x 600px. First, grab the Rectangle Tool (M) from the Tools Panel and create a rectangle with the same dimensions as the Artboard. Open up the Gradient Panel and fill the resulting shape with linear gradients as shown below: dark grey (R=77 G=77 B=77), medium grey (R=151 G=151 B=151) and dark grey (R=77 G=77 B=77).

2. Let’s create a grunge effect and apply it to the background. I use Free Vector Grunge Pack 2 made by cesstrelle. Many thanks to her for making this available! Paste the appropriate texture into the current document (File > Place…) and rotate the texture by 90 ° clockwise. We need a texture to be an exact size. Activate the Transform Panel and enter the values in the width (W) and height (H) text fields to determine the exact size of the object: 786px (W) and 600px (H). To precisely position the texture, click on the top left reference point and change the coordinates as follows: 0px (X) and 0px (Y). Keep the object selected, and in the Control Panel click on the Tracing options dialog. Once done, apply the shown values and confirm with Trace. Press the Expand button to convert tracing object into paths. In the Color Panel set the fill color to light grey (R=202 G= 202 B= 202). Open up the Transparency Panel and change the Blending Mode to Overlay (Opacity 35%).

3. Choose another grunge texture and drag it to our document. Once done, increase the dimensions to approximately the size of the background. You can manually move or resize the grunge texture. To change the objects’s location or its dimensions more precisely, use the Transform panel instead, as we did in the previous step. Keep the texture selected, open up the Tracing Options… and fill the data values as shown on the image below, and click Trace. After that, just hit Expand to gain access to the anchor points. Go to the Color Panel and set the color of the selected object to medium grey (R=151 G= 151 B= 151). In the Transparency Panel set the Blending Mode to Overlay (Opacity 50%).

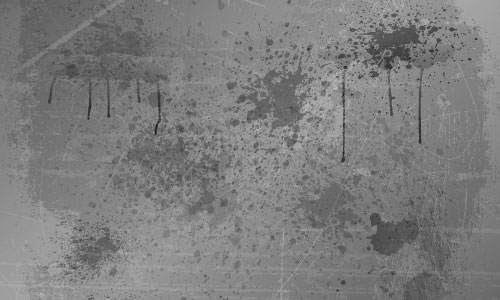
4. Let’s apply some splattered paint to the grunge background. Save another vector elements to your computer (visit Franz Jeitz website) and then go to File > Place… and import the image into the document. Now we can start building our paint splatter area. Select first splatter and bring it to the background surface. Scale it down a bit (if needed) and place the object as shown below. Open up the Color Panel and fill the resulting shape with dark grey (R=102 G=102 B=102). Set the Blending Mode to Overlay (Opacity 100%) in the Transparency Panel. Make a copy of the previous splatter and resize it a bit. Then, rotate the object and put it in its place. Keep the object selected and change the color to dark grey (R=77 G=77 B=77). Activate the Transparency Panel and change the Blending Mode to Overlay (Opacity 100%).

5. Select the next splatter and move it to the upper right corner of the backgound. Go to the Color Panel and fill the resulting object with dark shade of grey (R=51 G=51 B=51). Make sure you set the Blending Mode to Overlay (Opacity 100%). Duplicate the previous shape and move it to the left a bit. If you want to, you can increase the size of the splatter as shown in the figure below. Keep the color as it is, and in the Transparency Panel set the Blending Mode to Hard Light (Opacity 50%).

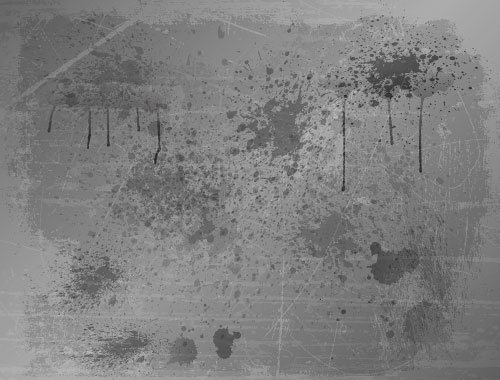
6. Pick some drips and bring it to the paint splatter background. Now, go to the Gradient Panel and fill the selected object with linear gradients as shown below: pure black (R=0 G=0 B=0) and light grey (R=153 G=153 B=153). In the Transparency Panel change the Blending Mode to Overlay (Opacity 75%). Select another drips element and place it in the right corner of our background. Open up the Gradient Panel and apply the following colors: black (R=26 G=26 B=26) and light grey (R=128 G=128 B=128). Go to the Transparency Panel again and set the Blending Mode to Overlay (Opacity 75%).

7. Choose another splatter and move it to the bottom right corner of the background. Keep the object selected, and go to Object > Compound Path > Make (Ctrl+8), to make a single object. Go to the Gradient Panel and apply the gradients to the compound path as follows: dark grey (R=77 G=77 B=77) and light grey (R=228 G=228 B=228). Open the Transparency Panel and change the Blending Mode to Multiply (Opacity 75%). Make a copy of the previous object and scale it down a bit. Then, rotate the object and move it to the left (refer to the image). In the Transparency Panel set the Blending Mode to Multiply (Opacity 50%).

8. Using the techniques described earlier in this tutorial, you can keep adding more splatters and texture until you have achieved the look you like! That’s it. I hope you’ve enjoyed reading this tutorial.
View the list of all 101 Illustrator special effects tricks at 101 Illustrator Special Effects.

Comments are closed.