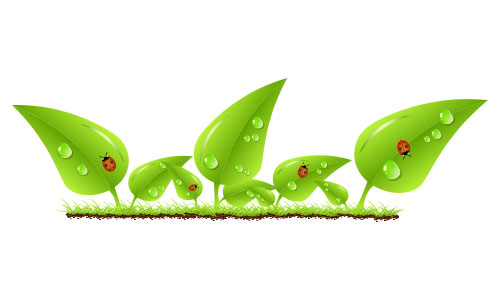

In this tutorial, I’ll show you how to create a green design concept in Adobe Illustrator. You will learn interesting techniques on how to use various symbolism tools, Warp Tool, along with a great Mesh Tool, in order to achieve a unique design. So, let’s see how it is done!
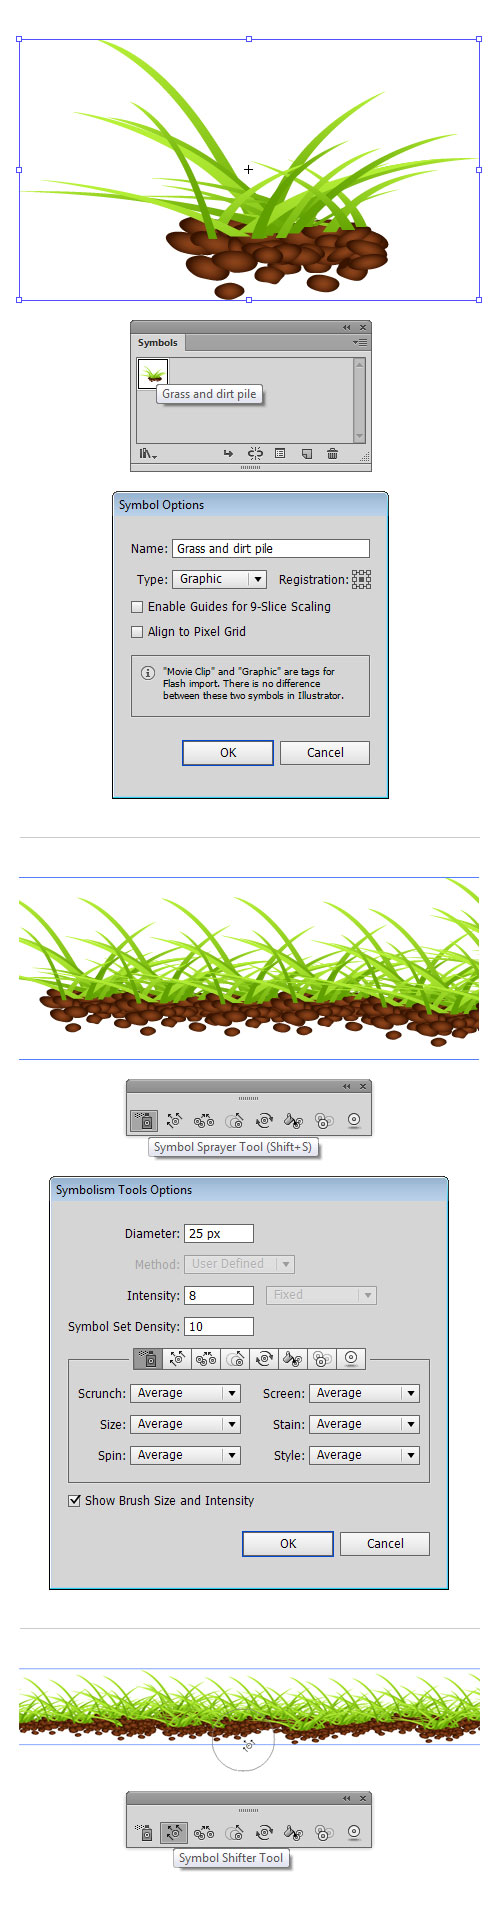
1. Open up a new document and set the dimensions of the Artboard to about 700 x 420px. Let’s create a clod of dirt first. Grab the Ellipse Tool (L) from the Tools Panel and create an ellipse, as shown in the image below. Open up the Gradient Panel and fill the shape with linear gradients as follows: medium brown (R=138, G=66, B=26) and dark brown (R=56, G=20, B=0). Draw as many shapes as you want, until you have the desired result.
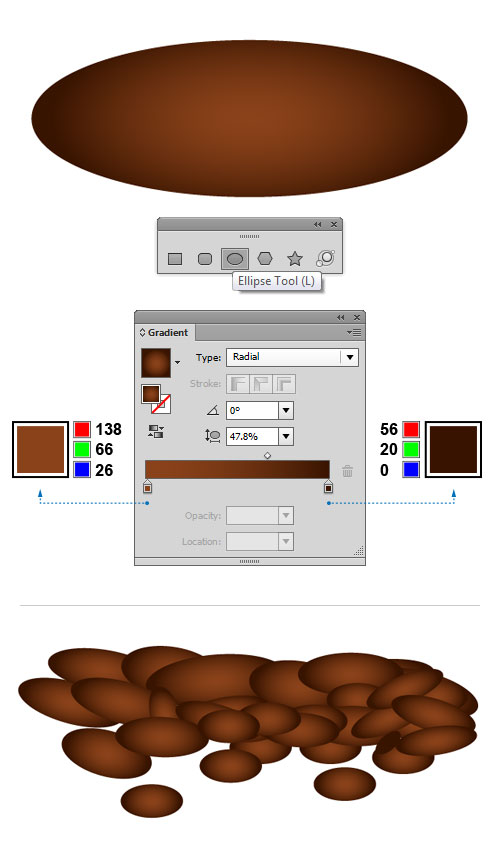
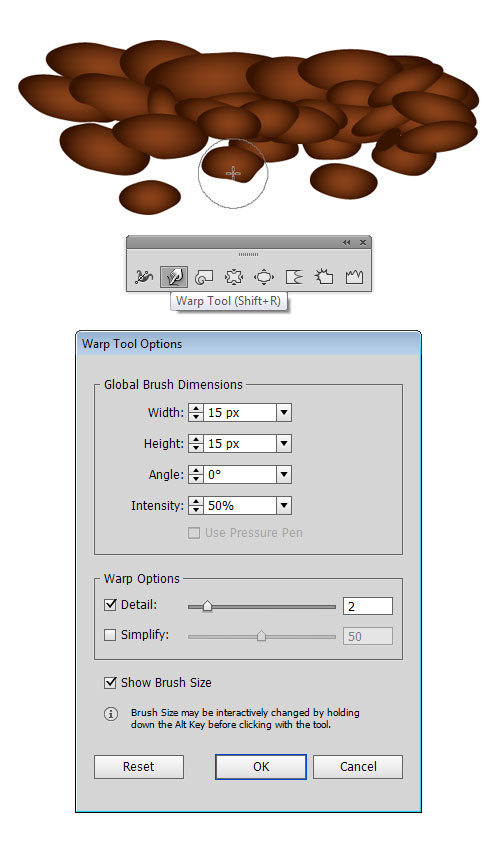
2. To further randomize the lump of dirts, we can actually change the shape and size of every single dirt element individually. Simply click and hold the Width tool to view a pop-out menu of the seven Liquify tools. Then release your mouse over the tool you want to use. Or simply use the keyboard shortcut Shift + R to access the basic Warp tool. To open the “Options” box and change the settings for a Warp tool at any time, simply double-click the tool’s icon. Enter the values shown in the image below and click OK. To distort the edges, click and drag the Warp Tool brush over the selected objects. The Warp tool tends to distort if used too much, so be careful not to overdo things.
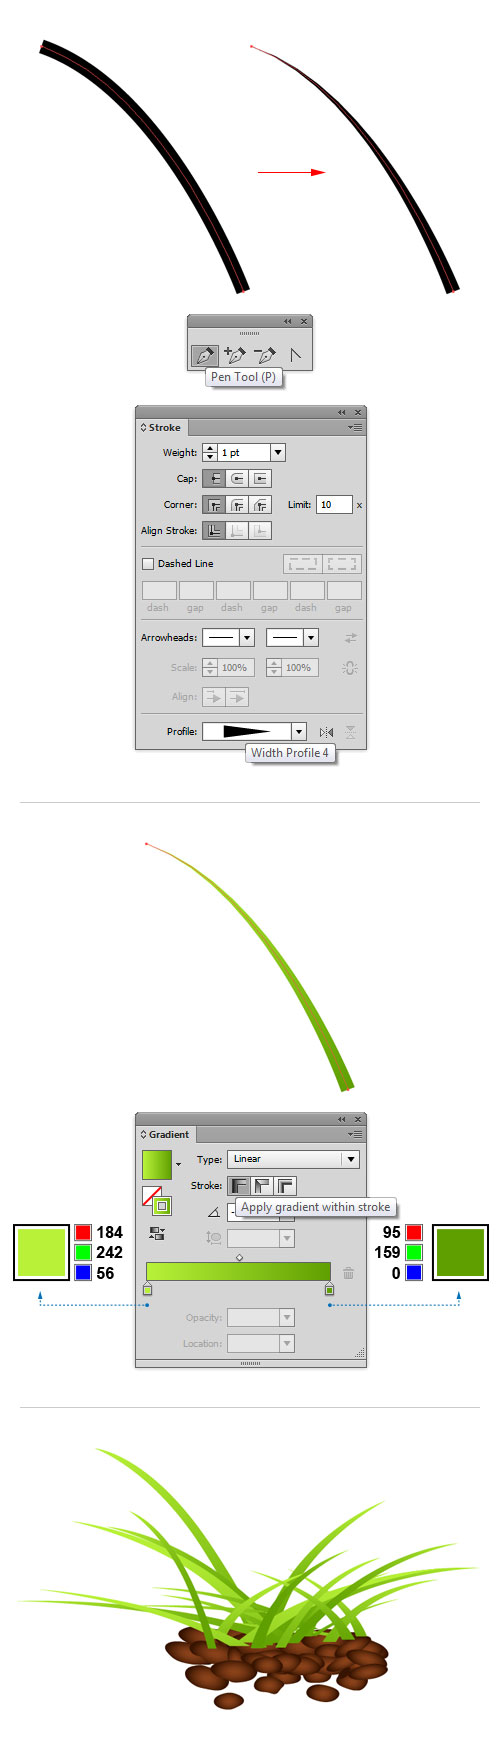
3. Let’s create some grass and place it on top of the dirt pile. Grab the Pen Tool (P) and create a curved path, as shown below. Make sure the path is still selected, and in the Stroke Panel choose the ‘Width Profile 4’, to apply a given style to the line. When you’re done, apply the gradient within stroke by clicking first icon in the Gradient Panel and fill the resulting shape with linear gradients: light green (R=184, G=242, B=56) and medium green (R=95, G=159, B=0). Using the same techniques, you can simply create a turf grass. To make it more interesting, you can set different gradient angles for each blade of grass.
4. Once done, select both the turf grass and dirt pile and group them (Ctrl+G). Activate the Symbols Panel and click on the New Symbol button. When the Symbol Options appear, give the symbol a name, in this case “Grass and dirt pile”. Select the symbol type as ‘Graphic’ and confirm with OK. Grab the Symbol Sprayer Tool (Shift+S) and select the newly created symbol. Just click and drag, release the mouse when you think that there are enough symbol instances. Don’t worry about placing them right yet, just make them dense. The symbol set of instances appears in a bounding box (refer to the image). You can use the Symbol Shifter Tool to move the symbols around and place them on their place, until you’re satisfied. When done, you should get something similar to the image below.
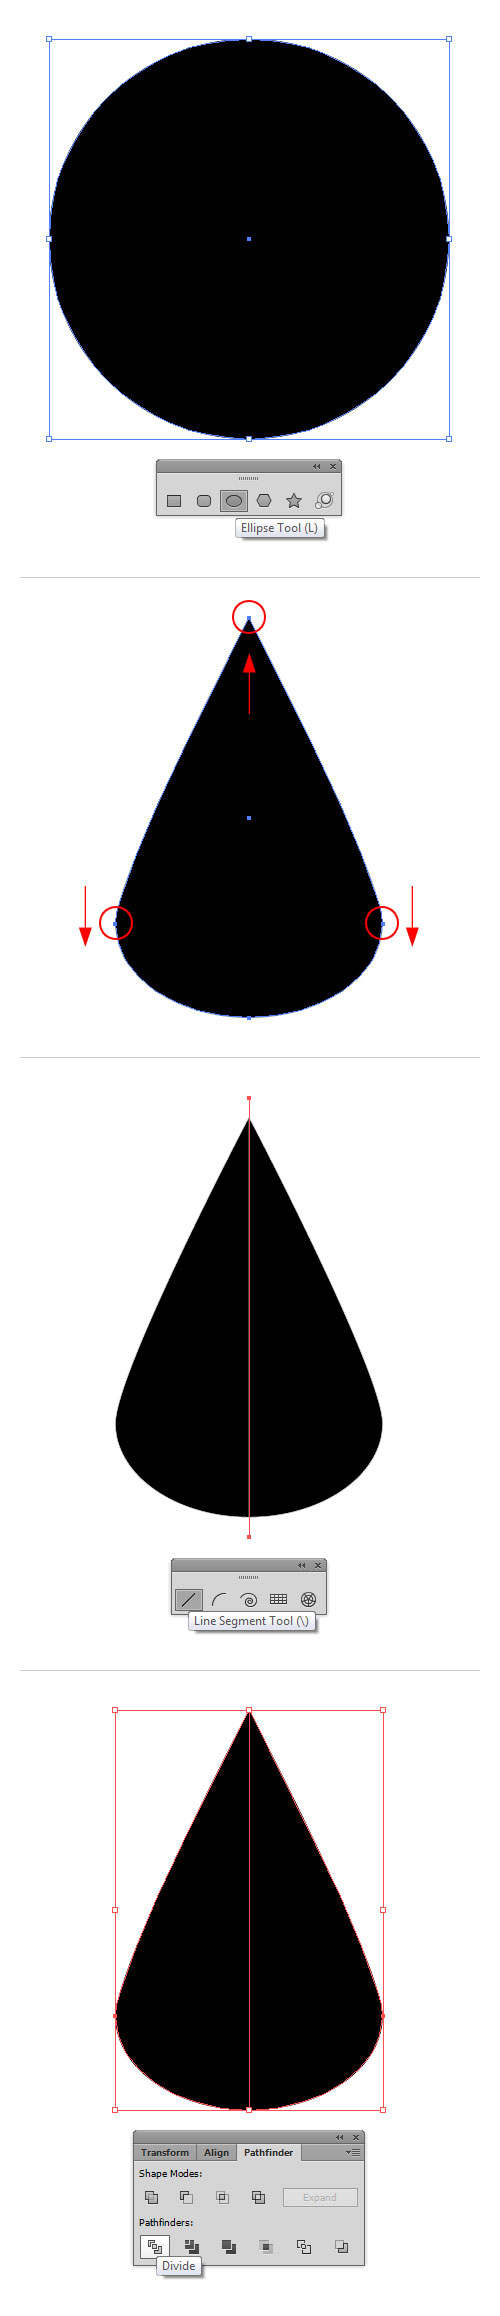
5. It’s time to create some leaves in ground. Using the Ellipse Tool (L) create a perfect circle (hold down Shift to constrain the proportions). Select both left and right anchor point and move them down a bit. Then, select the top anchor in the ellipse and drag it up almost doubling its original size. Pick the Line Segment Tool (\) and draw a straight vertical line that starts at the tip of leaf and ends in the middle of the bottom part of the leaf. After selecting the line and the leaf shape, press the Divide button in the Pathfinder Panel, so we get two separated surfaces.
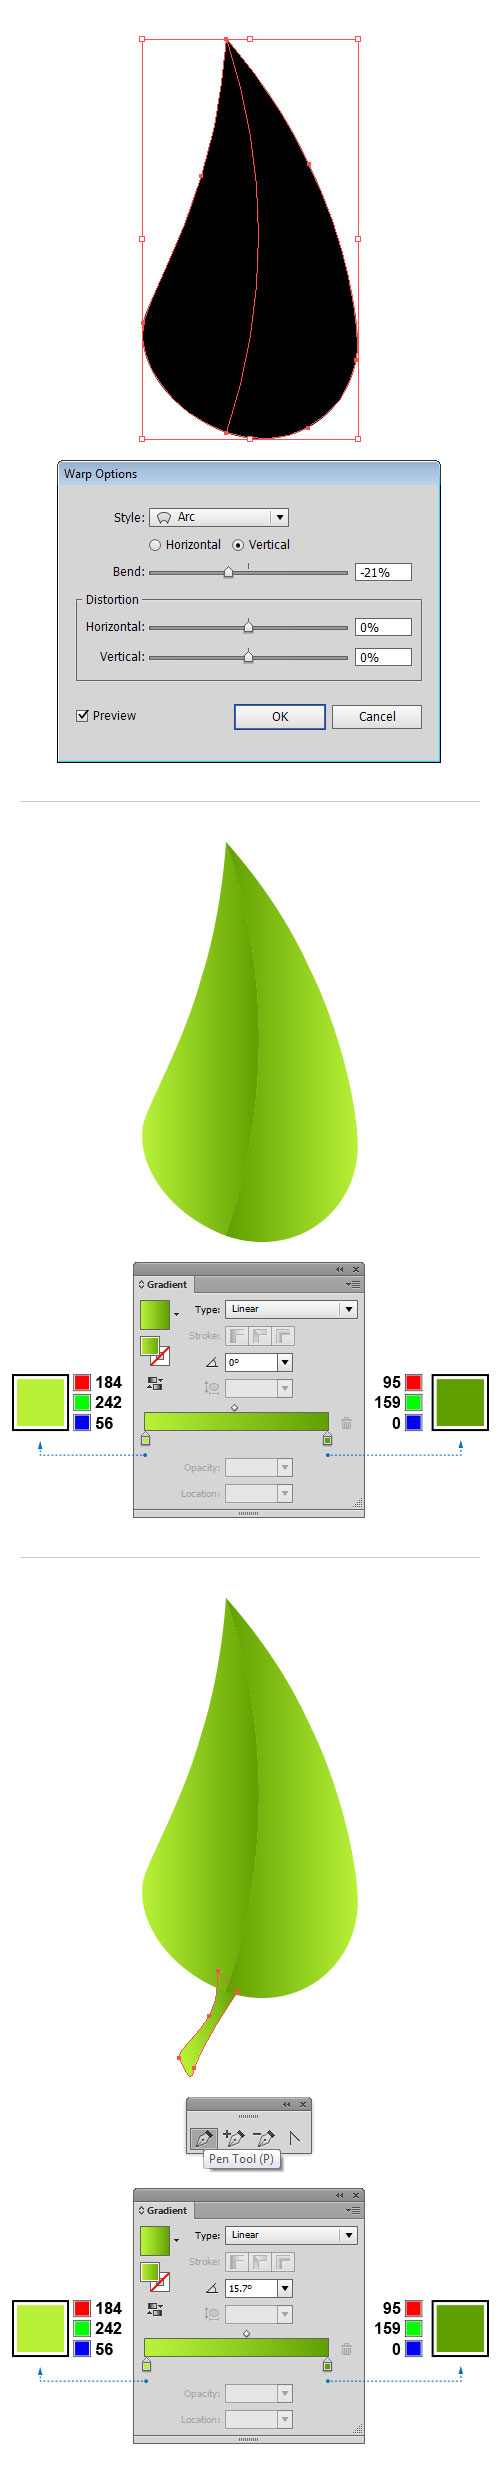
6. While the objects are still grouped, go to Effect > Warp > Arc and the dialog box will appear. Once done, ensure that ‘Vertical’ option is checked. The ‘Bend’ slider should be set to -21%. In the Distortion section keep the ‘Horizontal’ and ‘Vertical’ at their default values. Now select Object > Expand Appearance, in order to expand the object. Ungroup the objects (Shift+Ctrl+G), go to the Gradient Panel and fill the selected leaf half shape with linear gradients as follows: light green (R=184, G=242, B=56) and medium green (R=95, G=159, B=0). Do this again for the other half of the leaf. Choose the Pen Tool (P) from the Tools Panel and create a stem shape. Send it behind the leaf shapes using the Send Backward (Ctrl+[) command.
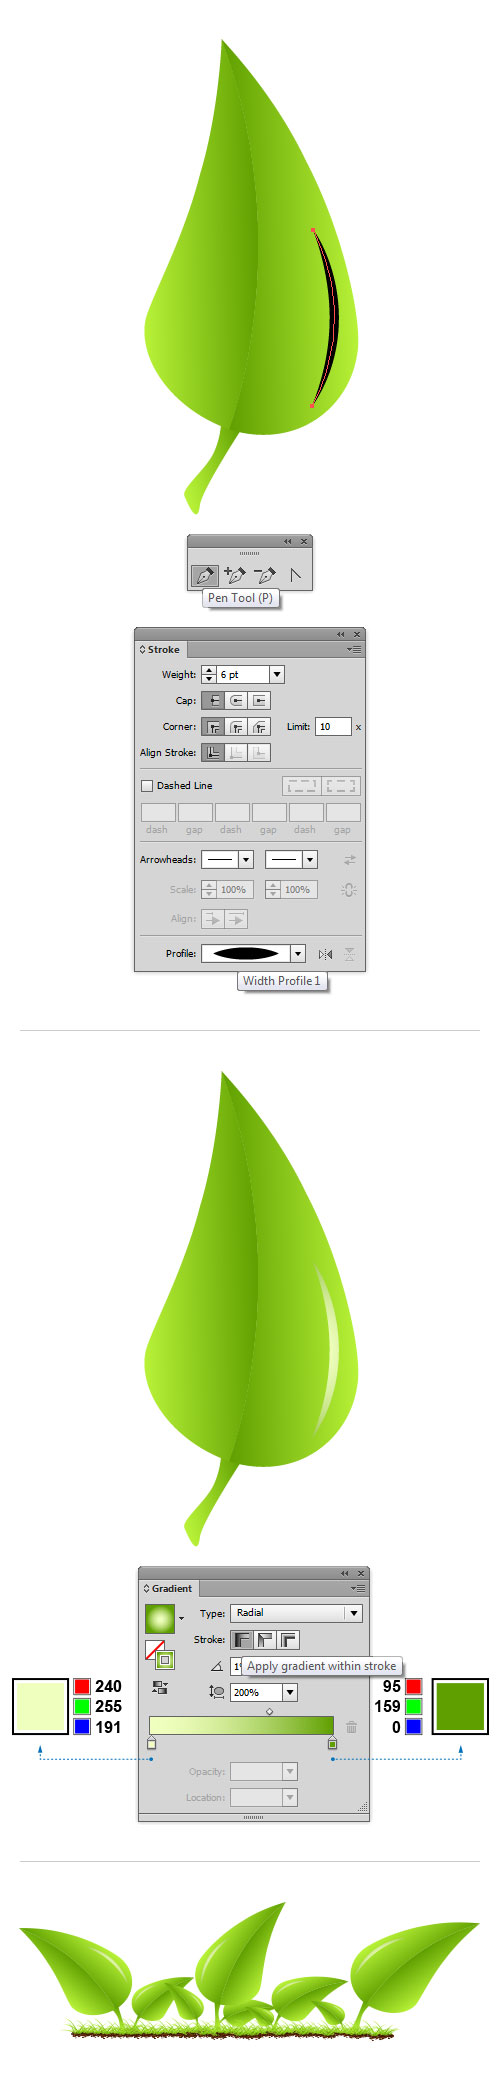
7. To complete the leaf, grab the Pen Tool (P) from the Tools Panel and create a curved line, as shown in the image below. Keep the path selected, and in the Stroke Panel choose the ‘Width Profile 1’, to change the Variable Width Profile of the stroke. Open up the Gradient Panel again and set the following stroke colors: light yellow (R=240, G=255, B=191) and medium green (R=95, G=159, B=0). In the Stroke Panel set the Stroke Weight to 6pt. Make several copies of the leaf and elements and arrange it all over the turf grass. If you want, you can flip the leaf horizontally and scale it down a bit. Also, you can rotate the leaves only, leaving the stems intact. Repeat this step a couple of times, until you’re satisfied.
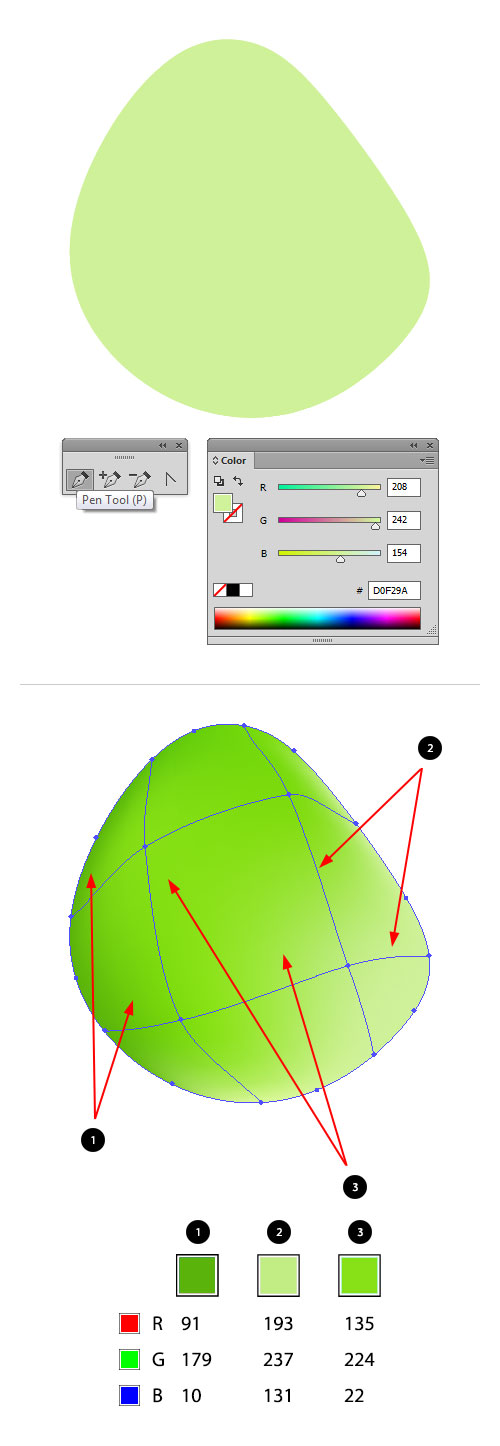
8. Let’s create a water drop now. Pick the Pen Tool (P) and draw a basic water drop shape. Once done, fill the resulting shape with light green (R=208, G=242, B=154). We will need to set up some base colors for our object. Select the Mesh Tool (U) and add a mesh line by clicking on the shape. If you decide to go into more details, you can add as many mesh lines as you want. Grab the Lasso Tool (Q) and draw around all the mesh points that you want to select and then apply the desired color. Do the same for the rest of the mesh points. If you want, you can easily make the adjustments by pulling some control handles.
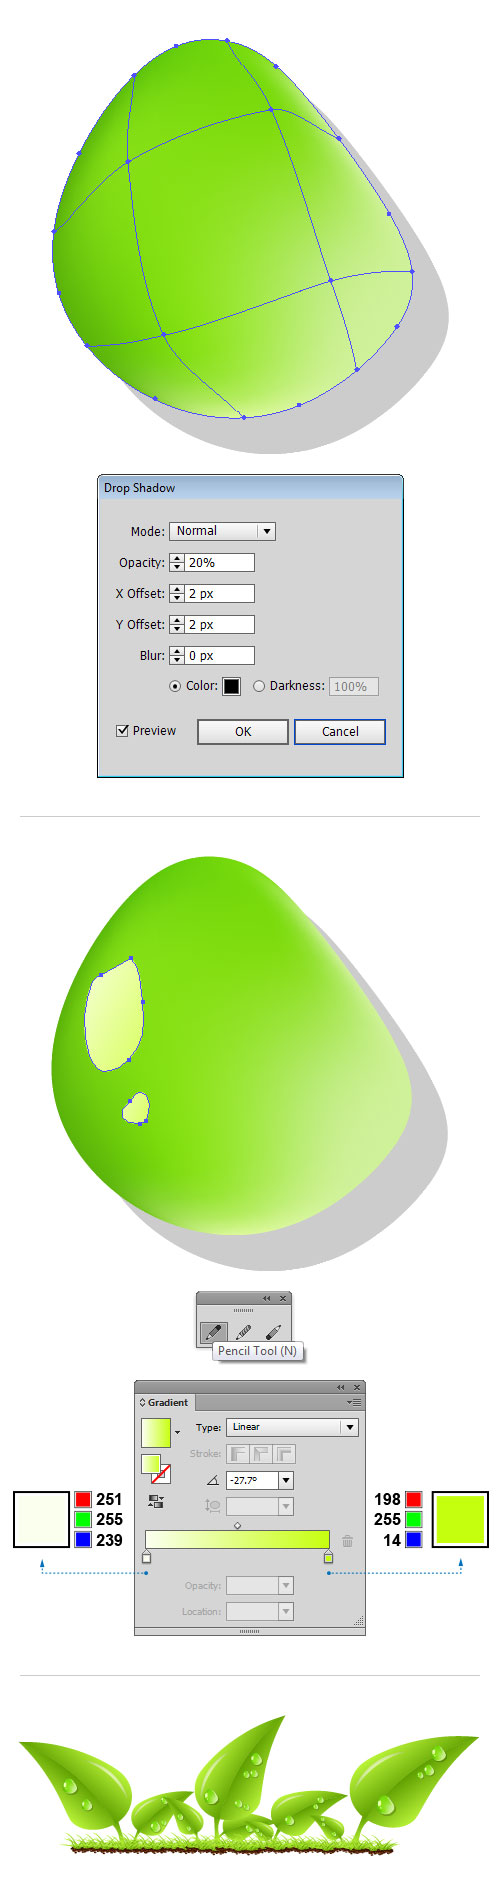
9. While the object still selected, go to Effect > Stylize > Drop Shadow and enter the shown values. Grab the Pencil Tool (N) and draw two different sized irregular shapes and place them over the upper part of our main object. Those will be the highlights of the water drop. When it looks good, open up the Gradient Panel and apply the linear gradients to the highlights, as shown: white (R=251, G=255, B=239) and light green (R=198, G=255, B=14). Now group all water drop elements, copy, scale and place them on the other leaf shapes. When you’re done, you should end up with something similar to the image below.
10. Let’s create a simple ladybug. Create a ladybug body using the Ellipse Tool (L). Then, using the same tool create another object and place it over the upper part of the body. Finally, create two small circles for the eyes. Select all objects, and in the Pathfinder Panel click on the Divide button to divide the surfaces. Now ungroup the objects (Shift+Ctrl+G) and get rid of the parts we don’t need (refer to the image). Pick the Pen Tool (P) and create a shape over the left side of the body.
Make a copy of the previous object, flip it horizontally and place it over the right side of the body. To divide the ladybug body into three parts, select these top objects one at a time, and go to Object > Path > Divide Objects Below. Select these newly created objects (except the middle one), and go to Object > Compound Path > Make, so we get a single shape. Open up the Gradient Panel and fill the selected object with radial gradients as shown below: light orange (R=232, G=143, B=33), dark red (R=158, G=44, B=6) and light orange (R=232, G=143, B=33). Select the middle part and fill it with radial gradients as follows: light orange (R=215, G=107, B=17) and dark red (R=158, G=44, B=6). To finish the ladybug, create some ladybug spots and antennae. Make several copies of the ladybug and arrange them randomly. That’s it. I hope you’ve enjoyed this tutorial.

View the list of all 101 Illustrator special effects tricks at 101 Illustrator Special Effects.
