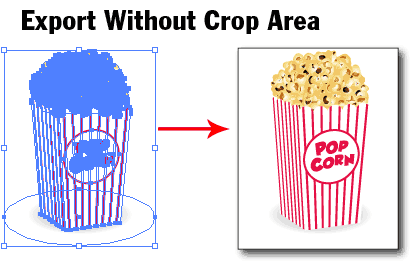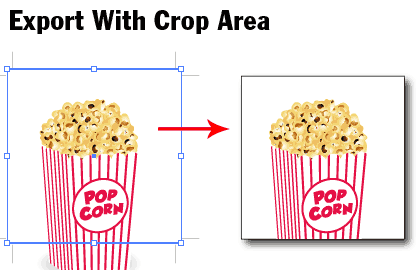
This is what happens when you try to export your vector art from illustrator. You realise the image exported out isn’t the same as the artboard or there are ugly white spacing around the image. So why does this happen? When you export an image, illustrator will calculate the bounding box of the whole area taken up by your image including the clipping mask and set that as the image area. This normally leaves a lot of white spacing around the image.
The solution to this problem is simple. Draw a box in the canvas and define it as the crop area by going to Object>Crop Area>Make. This will define the crop area. So when you export our the image will show only the crop area.
15 thoughts on “Illustrator Tip #13: Cropping Images”
Comments are closed.

I’ve never thought it was possible, a really timesaver.
Nice trick! Thanx.
Nice thank you! I was searching for this a while back.
Thanks for the tip!
Thanks for the tip.nice trick. enjoy
thanks so much! this is going to save tons of time.
Thanks for sharing. Lots of time I get lost trying to figure out how to eliminate the extraneous white-space.
This cropping issue happens a lot to us. Good info, will definately forward along to our designers…
Put an update how to do this in CS4.
I tried to do this in CS4, but could not find Crop Area under the Object menu.
Hi Khawla, Illustrator CS4 is different. Use the new Artboard Tool to define the crap area. When you export the image, remember to check “Use Artboard”.
Thank you!
CS4’s Artboard tool is really nice. I use it all the time.
If you group the artwork and then click on it with the Artboard tool it auto selects the object’s bounding box. Very quick. I then zoom to fit and save.
The amount of time it saves and the neat view of the artwork on reopening as well as when you place it in a document saves enormous amounts of time.
i still can’t solve the problem on my pc (Ai cs4)!
could somebody help me solve this problem? thanks!
Thanks a lot 🙂
I’ve been using Illustrator for 16 years and never knew this — a lifesaver. Thank you very much.