
This quick Illustrator tip will show you how to make a simple and very attractive repeatable blur effect with letters that give to your text a special echoing effect.
Preparing the Text
1. Open a new file, we’ll make a web project for now. Choose 72 dpi and 800×600 pixels for the canvas. Create a text with Text Tool (T).
In Character panel choose a big size (72pt) and a clear heavy font. In this case, I chose Arial Black.
Also select 50 for tracking between letters.
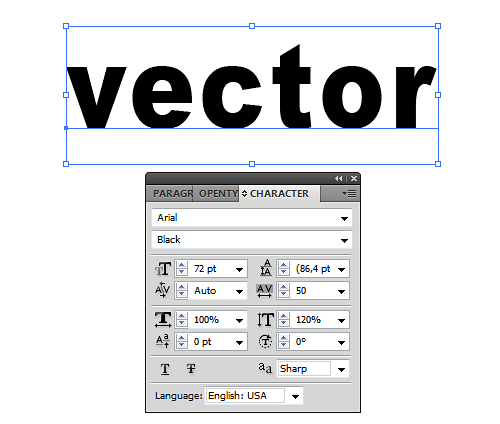
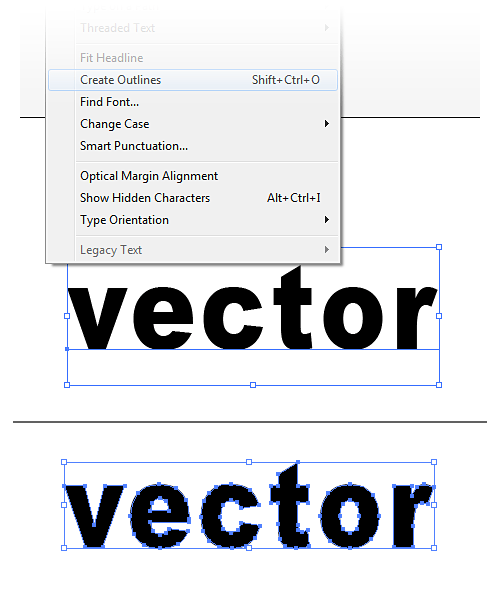
2. It’s time to turn the text to paths.
From the menu of the top, choose Type > Create Outlines.
If you want, you can ungroup the letter-shapes with right click and ungroup, I recomended you to do it for more flexibility!
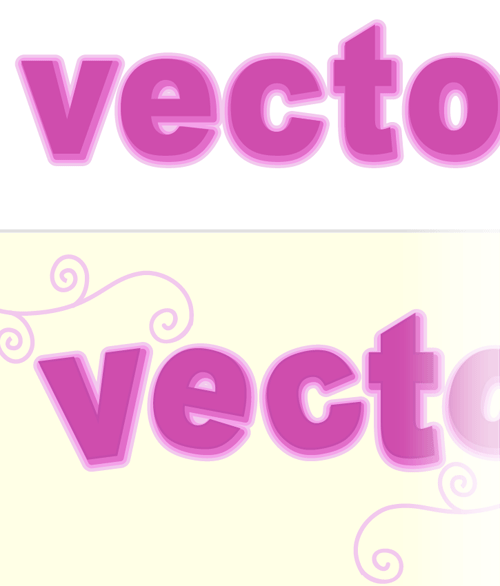
3. Apply to your letters the color you like! Select all the letters and duplicate as we need to apply another effect later on.
With the letters selected, (the first copy) go to the menu on the top Object > Path > Offset Path and with preview box selected, choose Offset:1,5px, Joins:Round, Miter limit:5 and click OK!
After that with the new text still selected, choose a new color that is lighter! Repeat that step (without deselect the text) with the same options! And this time give a color little bit lighter from the second letters that is behind the first and little larger after the compount path. Repeat the same steps and that’s it! Give it a lighter color!

4. Select all the top letters of your text (the original text) and move nudge them a little to the top left with the arrow keys. Now the text seems more 3d, doesn’t it? Ok! Still with top letter selected go to the color palette and give the a thin stroke in a little more darken color than fill! Perfect! Now you move and resize each group of a letter as you wish to make it more dynamic That’s it! You can create the background and the decor you want!
Another Text Effect Style
5. Let’s find out how to create another alternate text effect. Select the second copy of the text we had created and repeat the 3 steps with Offset path, same options but we don’t change the color of the letters at all! (armodexperiment.com) When we’ll done with the the 3 copies (by offset path), we select all the letters we created till now and we apply from color palette a very thin white stroke.
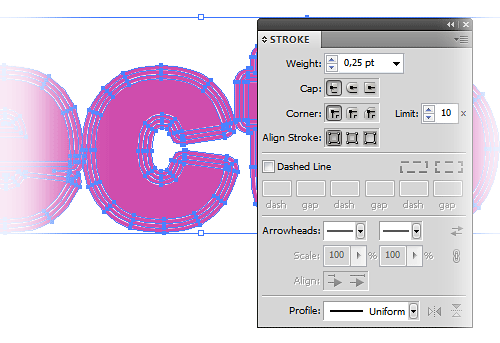
6. Now with all letters still selected, we deselect only the top group of letters and from Transparency Palette and give it 70% transparency! Great! We continue to deselect the second “layer” (zoom in if you need it) of letters and apply 50% transparency! At last, deselect the third layer and apply to the back letters 30% transparency! That’s it!

7. At last we can resize and rotate the letters to make it more interesting.


Thank you for share 😉
Great illustration which can attract someone easily so i like it a lot and thanks for sharing it.
Hi!
Step 3. Is not displayed image!
Please, check it!
Thanks!
good tips..thanks for sharing